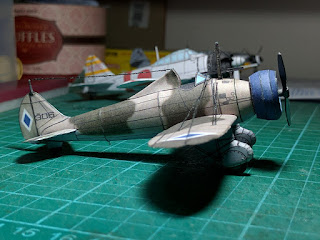
Let the test build begin!
All parts fit in one A4 sheet. Very convenient!
Making the Engine
Seeing the Engine as the most tedious part to assemble, I chose to make this first.
I forgot to add the placeholders for the engine cylinders! As a workaround, I used the engine cover as a guide for spacing out the cylinders.
Engine done!
Fitting in the cowling as a big pain! The 'gap' that I put between the engine cylinders and the cowling was insufficient. I'll have to go back to METASEQ and adjust this. In the mean time, I had to peel off the cylinder covers to allow the engine to fit inside the cowling.
The Fuselage
Nothing special.
Instead of using joining strips, I opted to have both ends of each fuselage segments have their own formers. Then it should be much easier to join the fuselage parts together.
Fuselage done! (NOTE: Engine is not yet attached at this point. I only dry fitted it to see if the alignment is correct.)
Vertical Stabilizer
The vertical stabilizers wrap around the tail end of the fuselage.
Done!
Horizontal Stabilizers
Before I attached the elevators, I glued a bit of cardboard on the place holders. This should help the elevators keep their shape.
Done!
Wings
For the wing formers, I had to trim off a bit off the wing spars. I'll adjust the model in metaseq later.
Wings done!
At this point, it already looks like a P-26.
Landing Gears
Now it's time to work on the landing gears.
These are the parts that comprise the wheel spats.
And these are the parts that make up the rear landing gear.
The wheel spats were surprisingly easy to assemble!
Almost there...
Propeller and other doodads
For the propeller shaft, I used a bamboo toothpick.
The model is technically done! All I need to do now is to add the rigging.
Rigging
To be honest, I had no idea how to proceed with doing the rigging. Most of the craft blogs and forums recommend thin wire. But I didn't have any at hand.
I chose to experiment using black cotton thread stiffened with CA.
It worked pretty well.
The Finished Model
My little squadron. I need one more plane to have a schwarm!
I'll make some adjustments to the model to factor in the build problems I encountered. After that, I'll upload the model in the PM forums.


No comments:
Post a Comment