Showing posts with label design. Show all posts

Thursday, April 7, 2016

Philippine Army Air Corps P-26 Peashooter (part 04)

Let the test build begin!

All parts fit in one A4 sheet.  Very convenient!

Making the Engine

Seeing the Engine as the most tedious part to assemble, I chose to make this first.

I forgot to add the placeholders for the engine cylinders!  As a workaround, I used the engine cover as a guide for spacing out the cylinders.

Engine done!

Fitting in the cowling as a big pain!  The 'gap' that I put between the engine cylinders and the cowling was insufficient.  I'll have to go back to METASEQ and adjust this.  In the mean time, I had to peel off the cylinder covers to allow the engine to fit inside the cowling.

The Fuselage

Nothing special.  

Instead of using joining strips, I opted to have both ends of each fuselage segments have their own formers.  Then it should be much easier to join the fuselage parts together.

Fuselage done!  (NOTE: Engine is not yet attached at this point.  I only dry fitted it to see if the alignment is correct.)

Vertical Stabilizer 


The vertical stabilizers wrap around the tail end of the fuselage.  
Done!

Horizontal Stabilizers

Before I attached the elevators, I glued a bit of cardboard on the place holders.  This should help the elevators keep their shape.

Done!

Wings

For the wing formers, I had to trim off a bit off the wing spars.  I'll adjust the model in metaseq later.

Wings done!

At this point, it already looks like a P-26.

Landing Gears

Now it's time to work on the landing gears.

These are the parts that comprise the wheel spats.  

And these are the parts that make up the rear landing gear.

The wheel spats were surprisingly easy to assemble!

Almost there...

Propeller and other doodads

For the propeller shaft, I used a bamboo toothpick.

The model is technically done!  All I need to do now is to add the rigging.

Rigging

To be honest, I had no idea how to proceed with doing the rigging.  Most of the craft blogs and forums recommend thin wire.  But I didn't have any at hand.  

I chose to experiment using black cotton thread stiffened with CA.


It worked pretty well.

The Finished Model


My little squadron.  I need one more plane to have a schwarm!


I'll make some adjustments to the model to factor in the build problems I encountered.  After that, I'll upload the model in the PM forums.


Philippine Army Air Corps P-26 Peashooter (part 03)

Unwrapping in Pepakura

When the model was initially loaded in Pepakura, I was greeted with the dreaded warning message telling me that 100+ nodes were deleted, 100+ faces were merged, etc. etc. etc.

I went back to Metaseq to fix the problem (OBJECT -> Merge Close Vertices) until Pepakura stopped complaining.

Afterwards, I proceeded with unwrapping and set my scale to 1:72.

UV-Mapping

From Pepakura, I exported my UV Info (File -> Export -> Texture Editing -> 3d Model with UV Info).  I'll get back to this later.

I also saved my Pepakura file as a PDF.  
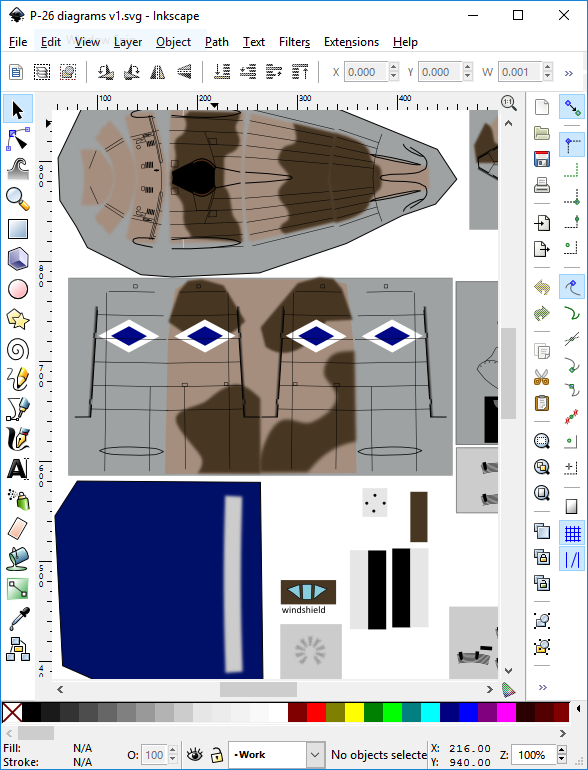
I then opened the PDF in Inkscape.  From Inkscape, I generated a bitmap file (PNG).  I set the size of the export to be 8000px wide.

Now for the actual UV-Mapping!

From METASEQ, I opened the OBJ file that I recently exported from Pepakura.  I then created a new Map object, and set the image to the PNG file that I exported from Inkscape.  I then assigned the map onto the model.

From there, I went to Metaseq's MAPPING mode.  Pepakura has done a good job in exporting the UV info.  The scale/position is a bit off.  A small bit of scaling an translations solved this.


Skinning / Texturing

Once I got the UV-mappings in place, I went back to Inkscape to draw the actual seam lines, camo, liveries, etc.  Switching back and forth between inkscape and metaseq allowed to check if the textures are aligned correctly.

Once all the textures are completed, I got this:


I then went back to Pepakura and refreshed my original unwrap with the updated textures:

And yeah, I added some last minute fuselage and wing formers...

Now the model is ready to build.

My next update will show the build process.

Philippine Army Air Corps P-26 Peashooter (part 02)

Low poly to wire frame

Once 'satisfied' with the way the model looks, I run the OBJECT>FREEZE function of Metaseq to convert the low poly model into a wire frame that I can work on.

Simplifying the model

In its current state, it would be impractical to unwrap the model for card modelling.  I'll need to reduce the number of edges/faces to make this easier to unwrap.

Using the KNIFE tool, I erased edges taking extra care that I maintain the curves of the teardrop-shaped fuselage.

I do the same for the wings.

Once done, I performed a boolean operation : WING minus FUSELAGE.

I do the same simplification + boolean process with the other parts.  The image above shows how the aircraft will go together as a card model.

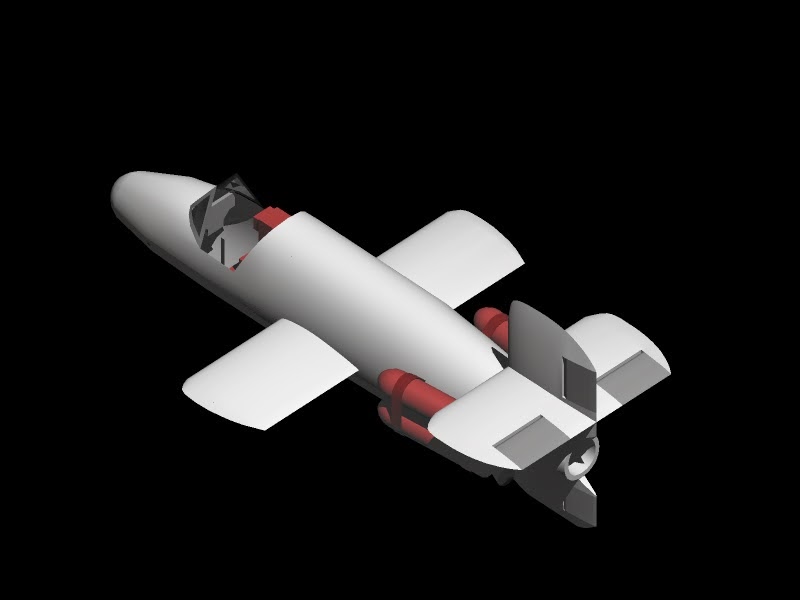
And finally, here's the model simplified ready for unwrapping in Pepakura.

My next update will discuss the unwrapping and texture mapping.

Sunday, December 20, 2015

Messerschmitt ME-328 and Autodesk123D Make (Done!)

Building the Model (continued)

Okay, I'm starting to get the feeling that this type of modeling is not suitable for aircraft.  I feel like I've been cutting layer after layer forever.

It got worse when i started working on the rudder.  Not fun... not fun at all.  :(

All done!

Finally, it's done!


Curves are captured beautifully, but straight edges are really bad.  The rear edge of the rudder is crooked.  But all in all, not bad! :)

Sunday, December 14, 2014

Bachem Ba-349 'Natter' - Part 01

Introduction

It's been a while since my last update.   It's been very difficult to get enough free time to engage in my new design.
Anyway, with the little free time I had, I was eventually able to make progress.
Here's where I'm at right now:


You can see it's almost done.  :)
But I will still create and share my work log, starting with this new entry. 

What is the Bachem Ba-349 'Natter' anyway?

Unlike my previous work, this one is technically not a Luft'46 plane.  This one was actually built, tested (unmanned), and flown (manned).  Unfortunately, the first manned flight also resulted in the death of its pilot, Lothar Sieber.
The plane never went operational.
The Natter was designed to be a manned missile.  It would have been launched vertically from a launch platform with the help of four solid fuel rocket packs and its main engine - a Walter HWK 109 rocket.  This is the same engine that powers the ME163 'Komet'.
Initial launch was handled by a crude guidance system that was meant to bring the Natter in the flight path of the approaching Allied bombers.  Once there, the pilot takes manual control and directs the Natter to the bombers.
When within range, the pilot fires the Natter's payload -- an array of 24 Henschel Hs297 Fohn rockets -- stored in the nose section.
Anyway, enough of that.  This is a design blog and not a history blog.
You'll find more about the Natter just by googling.

Creating the framework

In the past, I've always relied using the 4 window panel system of Metaseq: top, front, side, free.
I'd take an image from the 3-view diagram and use it as the background image for the top, side, and front panels.  
But though it gets the job done, it gets a bit difficult to get the exact shape of the model.
This time around, I took the 3-view, and then I created a new flat shape by tracing the outline of the plane like so:

I then 'traced' the other parts - the wings, rudders, tail fins, and fuselage side views.
Once done, I rearranged the parts to create a crude skeleton of the Natter:

Skinning the framework

With the framework completed, I proceeded to "skin" the skeleton by creating a subd surface, using the "skeleton" as the guide.

I started skinning the fuselage:

And after that, I worked on the wings and rudders:

Okay, based on the image above, you'll notice the canopy is wrong.  :)
I tried as hard as I can but I just can't seem to get the boxy canopy correct using subd surfaces.

So instead, I did the canopy manually after converting the subd surface into an actual wireframe:

I'll have to stop at this point for now.